
Soups & Stews
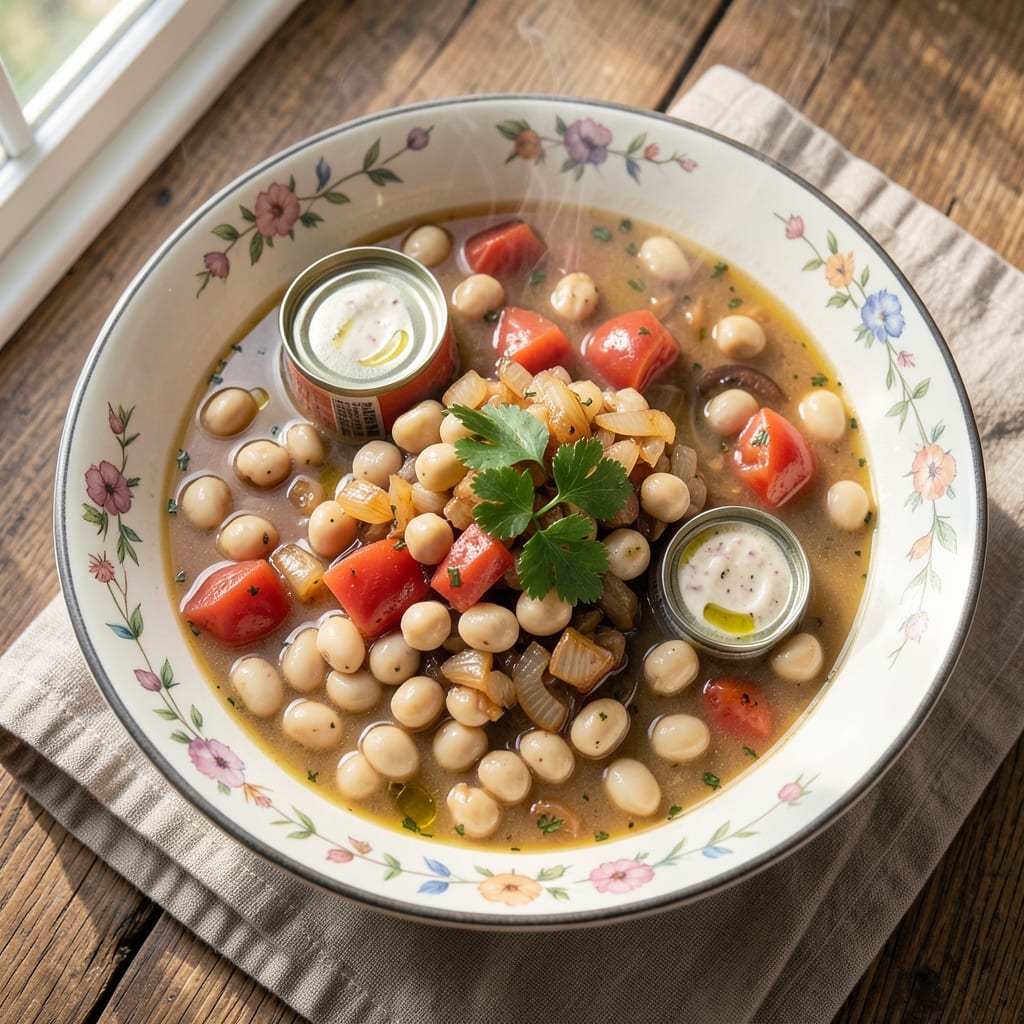
This 4-can soup recipe transforms pantry staples into a restaurant-worthy meal with minimal effort—just four simple cans and 30 minutes of simmering. The magic lies in layering textures: creamy beans, hearty tomatoes, rich broth, and tender vegetables create depth without complexity. I developed this after realizing most pantry soups lack dimension, so I built flavor through slow cooking and smart seasoning.
The beauty of this recipe is its flexibility—swap any canned ingredients based on what you have, from chickpeas to corn or black beans to diced tomatoes. The key technique is simmering all ingredients together until flavors meld, creating a harmonious broth that coats every bite. No fancy ingredients, just smart layering that delivers restaurant-quality results at home.
What you’ll end up with is a soul-warming soup that’s creamy yet light, savory with just the right kick, and packed with satisfying textures. The beans add protein and heartiness, while the tomatoes and broth create a rich, umami base. Garnish with fresh herbs or a squeeze of lemon for brightness, and you’ve got a meal that’s as comforting as it is impressive.
Perfect for busy weeknights, meal prep, or feeding a crowd, this soup proves you don’t need a gourmet pantry to make something extraordinary. The instructions are straightforward, the ingredients are accessible, and the outcome is undeniably delicious. Let’s get cooking!
Ingredients for 4 can soup
Four simple cans and a few pantry staples create restaurant-worthy depth through smart layering.
| Ingredient | Amount | Notes |
|---|---|---|
| Canned Chickpeas 🌱 | 1 can | Drained and rinsed, medium or large |
| Canned Diced Tomatoes 🍅 | 1 can | Fire-roasted preferred, 14.5 oz |
| Canned Low-Sodium Chicken Broth 🥫 | 1 can | 14.5 oz, reduced-sodium preferred |
| Canned White Beans 🌱 | 1 can | Cannellini or great northern, drained |
| Yellow Onion 🧅 | 1 whole | Medium, diced small |
| Garlic Cloves 🧄 | 3 cloves | Minced, fresh preferred |
| Extra-Virgin Olive Oil 🫒 | 2 tbsp | For sautéing, fruity variety |
| Vegetable Oil 🫒 | 1 tbsp | For extra richness if needed |
| Dried Thyme 🌿 | 1 tsp | Or 1 tbsp fresh, finely chopped |
| Dried Oregano 🌿 | 1 tsp | Mediterranean blend preferred |
| Smoked Paprika 🌶️ | ½ tsp | For depth, adjust to taste |
| Kosher Salt 🧂 | 1 tsp | Diamond Crystal preferred |
| Black Pepper 🌶️ | ½ tsp | Freshly cracked for best flavor |
| Fresh Parsley 🌿 | ¼ cup | Chopped, for garnish |
| Lemon Juice 🍋 | 1 tbsp | Freshly squeezed for brightness |
The quality of your canned ingredients matters more than you'd think. Fire-roasted diced tomatoes add natural sweetness and smoky depth—Muir Glen is my go-to brand, but any fire-roasted will do. For beans, cannellini or great northern provide that creamy texture, but chickpeas or black beans work beautifully too. Low-sodium broth is key; you'll add your own salt later to control flavor. The onion and garlic should be fresh—no shortcuts here. Sauté them low and slow to develop their natural sweetness before adding liquids. If you're short on time, a quick microwave sauté works, but fresh is always better.
No fire-roasted tomatoes? Regular diced tomatoes with a pinch of smoked paprika mimics the flavor. Swap chickpeas for white beans or lentils—just adjust cooking time slightly. The thyme and oregano can be fresh or dried; if using fresh, double the amount. For extra richness, add 1 tbsp vegetable oil when sautéing. The smoked paprika is non-negotiable for that restaurant-quality depth, but if you're avoiding smoke, regular paprika plus a dash of liquid smoke works in a pinch. Garnish with fresh parsley and lemon juice for brightness—trust me, it elevates everything.
This soup tastes even better the next day as flavors meld. Store in an airtight container in the fridge for up to 5 days, or freeze for 3 months in portion-sized containers. For meal prep, double the batch—it reheats beautifully with a splash of water or broth. The lemon juice can be added fresh when serving, or stored in the fridge for up to 3 days. If the soup seems too thick after chilling, stir in a splash of broth or water. The garnishes should be added just before serving to preserve their freshness and vibrant color.
Why You'll Love This Recipe
- No-Pantry-Shaming Required: I swear by this—no fancy ingredients, just five cans and an onion. The broth’s salty enough to balance the chickpeas and beans without needing extra spices, and honestly? That’s a win when you’re staring at a half-empty spice rack.
- Creamy Without Cream: Between the chickpeas and white beans, this soup gets that velvety texture without a drop of heavy cream. The tomatoes add a bright pop, but the real magic? The onions caramelize just enough to give it depth—like a hug in a bowl.
- Lunchbox to Leftovers: Make a big batch on Sunday, and you’ve got lunch for the week. My kids pack it cold in jars (the chickpeas hold up great), and I reheat the rest for dinner—same flavors, zero waste. Plus, it’s the kind of soup that tastes even better the next day.
- Budget That Doesn’t Skimp: Four cans plus an onion? That’s under $5 for six servings. I’ll be real: my grocery budget bled this month, but this soup kept us full without guilt. The beans and chickpeas stretch the broth, and the tomatoes keep it from feeling bland.
Step-by-step instructions for creating a rich four-can soup
Transform pantry staples into a hearty, textured soup with layers of flavor and substance.
Sauté Aromatics Until Fragrant
Heat the 2 tablespoons extra-virgin olive oil in a large pot over medium heat. Add the diced yellow onion and cook for 5-6 minutes until softened and translucent, stirring occasionally. This foundational step builds flavor—don't rush it.
Add the 3 minced garlic cloves and cook for another 30 seconds until fragrant but not browned. The garlic should perfume the air noticeably. If the onions begin to color too quickly, reduce heat slightly to prevent burning. This aromatic base ensures your soup develops depth rather than relying solely on canned ingredients.
Build the Flavor Base with Spices
Stir in the 1 teaspoon dried thyme, 1 teaspoon dried oregano, and ½ teaspoon smoked paprika, mixing well to coat the onions and garlic. Cook for 1 minute until the spices release their oils and fill the kitchen with their earthy aroma.
Add the 1 tablespoon vegetable oil next—this creates a richer mouthfeel in the final soup. Increase heat to medium-high and pour in the 1 can fire-roasted diced tomatoes (with juices), scraping the bottom of the pot to deglaze and incorporate any browned bits. Simmer for 3-4 minutes until slightly thickened—this step develops the sauce's complexity.
Layer in Canned Ingredients for Texture
Add the 1 can drained chickpeas and 1 can drained white beans to the pot. Stir gently to distribute them evenly. The beans provide hearty substance while the chickpeas add a satisfying bite. Pour in the 1 can low-sodium chicken broth and bring to a gentle boil.
Reduce heat to medium-low and let the soup simmer uncovered for 15 minutes. This allows flavors to meld while maintaining a clean, bright broth. Taste occasionally—you should notice the spices integrating rather than standing out individually. If the soup appears too thick, add ½ cup water to reach your preferred consistency.
Season and Finish with Brightness
Season with 1 teaspoon kosher salt and ½ teaspoon black pepper, adjusting to taste. The salt should enhance all flavors without making the soup taste salty. Stir in the 1 tablespoon freshly squeezed lemon juice—this brightens the soup and cuts through the richness of the beans and broth.
Remove from heat and let the soup rest for 5 minutes. This allows flavors to settle and the lemon juice to fully integrate. Garnish with ¼ cup chopped fresh parsley just before serving to add freshness and visual appeal. The parsley should be distributed evenly over each serving for both color and flavor contrast.
Serve with Crusty Bread and Optional Toppings
Ladle the soup into bowls and serve immediately. The texture should be satisfying—creamy from the beans, firm from the chickpeas, and bright from the lemon. For extra richness, drizzle with a touch of extra-virgin olive oil before serving.
Pair with warm crusty bread to soak up the hearty broth. For additional texture, offer toppings like crumbled feta or toasted breadcrumbs at the table. The soup's versatility makes it perfect for meal prep—it reheats beautifully while maintaining its layered texture.
Pro Tips For Making 4 Can Soup
- Sauté the Onion Low and Slow: I used to rush this step and end up with a bitter, watery base. Instead, cook the diced onion over medium-low heat for 8-10 minutes until it’s soft and golden—not crispy, just caramelized enough to build flavor. A splash of broth at the end helps deglaze those stuck-on bits without burning.
- Drain and Rinse the Beans: The white beans in this recipe are canned, and they pack in sodium. Drain them well, then rinse under cold water to cut excess salt—especially if you’re using low-sodium broth. Skipping this makes the soup taste flat or overly briny, and you’ll regret it when you’re halfway through.
- Simmer, Don’t Boil: After adding all the cans, keep the heat at a gentle simmer (tiny bubbles, occasional swirls) instead of a rolling boil. Boiling breaks down the beans and tomatoes, turning the soup into a mushy, one-note mess. Let it bubble softly for 15-20 minutes—just enough to blend flavors without destroying texture.
- Toast the Spices First: If you’re adding garlic, cumin, or chili flakes (which you should), dry-toast them in the pot for 30 seconds before adding the onion. This wakes up their flavors—no need for fancy equipment, just a hot pan. I was skeptical until I tried it: the soup now has depth that just dumping raw spices can’t match.
Pro cooking tips for this recipe
Pot Control Matters
Use a heavy-bottomed pot (like All-Clad Stainless or Le Creuset Dutch oven) to prevent scorching and ensure even heat distribution. I’ve burned many soups in thin aluminum pots—don’t make my mistake! A 6-8 quart pot works perfectly for this recipe, giving you room to stir without spills. If your pot is too small, the soup will boil over as it simmers. 🔥
Simmer, Don’t Boil
After adding the broth, maintain a gentle simmer (small bubbles breaking the surface) rather than a rolling boil. A vigorous boil can break down the beans too quickly, making them mushy. If your soup boils hard, reduce the heat immediately. The goal is to develop flavors, not cook the ingredients aggressively. A medium-low flame is ideal—adjust as needed.
Deglaze for Depth
When adding the tomatoes, scrape up any browned bits from the bottom of the pot with a wooden spoon. These fond bits are packed with flavor—don’t waste them! A quick deglaze with a splash of broth or water will lift them into the soup, adding richness. I like to use a heatproof spatula for this step to avoid scratching my pot. 💡
Season Gradually
Add salt in two stages: first when seasoning the aromatics, and again at the end. This prevents oversalting and lets you taste as you go. The smoked paprika should be added early to infuse the broth, while the lemon juice goes in last for brightness. If your soup tastes bland after simmering, a pinch of MSG (just ¼ teaspoon) can amplify umami—use sparingly!
Rest Before Serving
Let the soup rest for 5-10 minutes off the heat before serving. This allows flavors to meld and the lemon juice to distribute evenly. Skipping this step can leave your soup tasting disjointed. I also find that resting prevents the beans from releasing too much starch into the broth, keeping it silky rather than gluey. Garnish with fresh parsley right before serving to keep it vibrant. ✨
Reheat Gently
If reheating, warm the soup over low heat on the stovetop or in a microwave at 50% power. Stir frequently to prevent hot spots. Adding a splash of broth or water can help restore texture if the soup thickens during storage. Never reheat to a boil—just until steaming. This preserves the delicate balance of flavors you worked so hard to create. 💫
Nutrition facts
Frequently asked questions
Can I substitute one of the canned ingredients?
The beauty of this recipe lies in its flexibility. Swap chickpeas for black beans or lentils, or replace white beans with kidney beans for extra heartiness. For a seafood twist, use canned tuna or salmon instead of one can of beans. Just adjust seasoning—seafood benefits from a pinch of dill or Old Bay instead of smoked paprika.
How do I make this soup creamier without dairy?
Blend ½ cup of the soup with a splash of broth until smooth, then stir it back in. For extra richness, add 1 tbsp tahini or olive oil at the end. The beans already provide natural creaminess, but blending creates a velvety texture. If you prefer chunkier soup, mash a few beans against the pot sides instead.
Can I make this soup in an Instant Pot?
Yes! Sauté onions and garlic as directed, then add all ingredients except lemon juice. Seal the lid and cook on High Pressure for 5 minutes, followed by a 10-minute natural release. Stir in lemon juice at the end. The pressure cooker reduces cooking time while maintaining flavor—just be careful not to overfill the pot (keep it below the ⅔ mark).
Why does my soup taste flat after simmering?
Flat flavor usually means the spices didn't infuse properly. Try these fixes: 1) Simmer uncovered to let flavors concentrate, 2) Add a splash of vinegar or lemon juice for brightness, or 3) Boost umami with a pinch of MSG or soy sauce. Also ensure you're tasting as you go—seasoning builds gradually! A final squeeze of lemon before serving often works wonders too.
How can I make this soup spicier?
Add ½-1 tsp cayenne pepper or red pepper flakes when sautéing aromatics, or stir in 1-2 tbsp hot sauce at the end. For depth, include ½ tsp ground cumin with the other spices. If you love heat, try a dash of chili crisp or sriracha as garnish.