
Soups & Stews
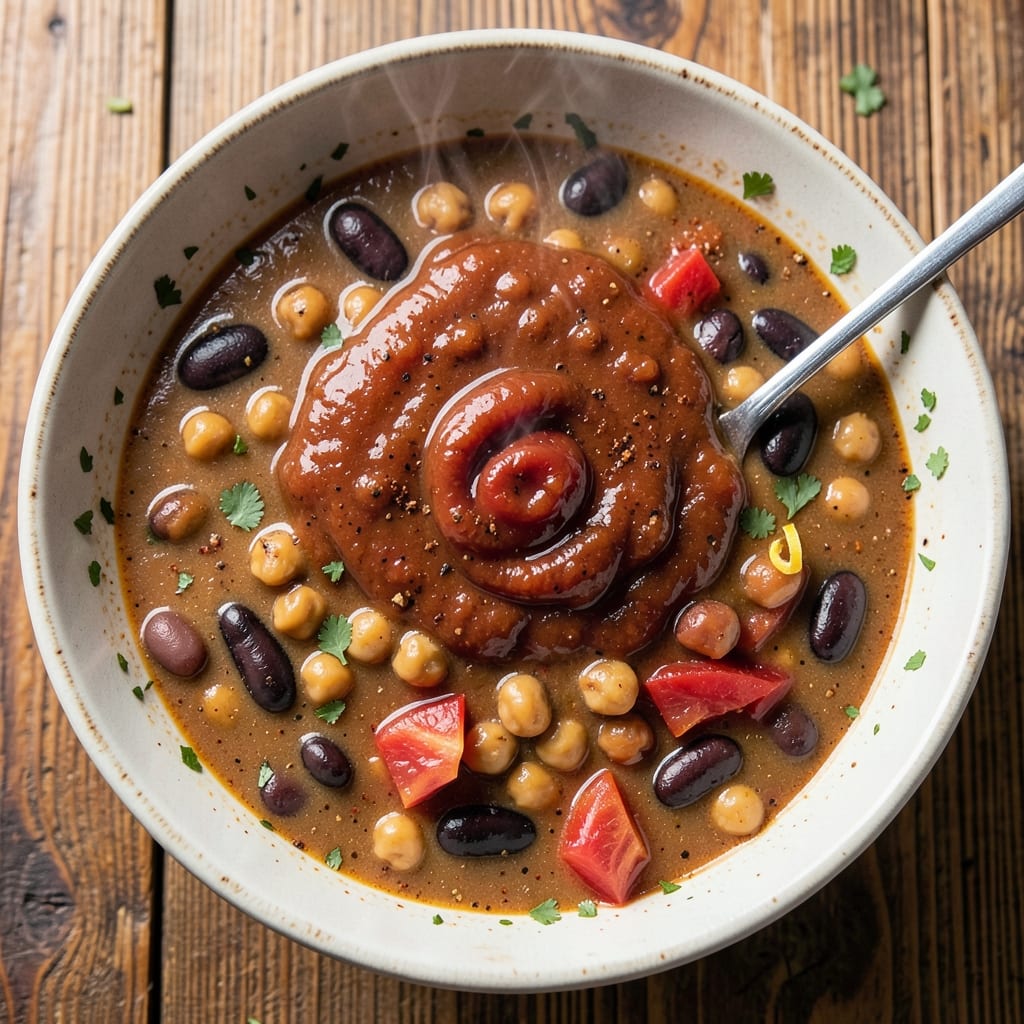
This 9-can soup recipe transforms pantry staples into a hearty, restaurant-worthy meal with minimal effort. The magic happens when three cans of beans, three cans of tomatoes, and three cans of broth combine into a rich, flavorful broth that simmers down into something extraordinary. I developed this recipe during a particularly busy week when I needed a meal that was both nourishing and foolproof—no fancy ingredients, just simple cans and a pot.
The beauty of this soup lies in its versatility and simplicity. You can customize it with spices like cumin, chili powder, or smoked paprika to suit your taste, or keep it classic with just salt and pepper. The beans provide protein and texture, while the tomatoes add depth and acidity, balancing the richness of the broth. It’s the kind of dish that tastes even better the next day, making it perfect for meal prep.
By the time you’re done, you’ll have a steaming pot of soup that’s hearty enough to stand as a main dish but simple enough to feel effortless. The flavors meld together beautifully as it simmers, creating a comforting, aromatic broth that’s perfect for chilly evenings. This recipe is a game-changer for anyone looking to stretch their pantry staples into something delicious without spending hours in the kitchen.
Whether you're feeding a family, meal prepping for the week, or just craving a warm bowl of soup, this 9-can soup recipe delivers on flavor, convenience, and satisfaction. Let’s get started!
Ingredients for 9 can soup
Three cans of beans, three cans of broth, three cans of tomatoes—just open, pour, and simmer.
| Ingredient | Amount | Notes |
|---|---|---|
| Black Beans 🌱 | 1 can | Drained and rinsed, no-salt-added preferred |
| Kidney Beans 🌱 | 1 can | Drained and rinsed, no-salt-added preferred |
| Chickpeas 🌱 | 1 can | Drained and rinsed, no-salt-added preferred |
| Diced Tomatoes 🍅 | 1 can | Fire-roasted preferred, no-salt-added |
| Tomato Sauce 🍅 | 1 can | Crushed tomatoes work too |
| Tomato Paste 🍅 | 1 can | Small (6 oz) can, no salt added |
| Chicken Broth 💧 | 1 can | Low-sodium preferred, or homemade |
| Vegetable Broth 💧 | 1 can | Low-sodium preferred, for depth |
| Beef Broth 💧 | 1 can | Low-sodium preferred, adds richness |
| Ground Cumin 🌿 | 1 tbsp | Toasted for deeper flavor |
| Smoked Paprika 🌶️ | 1 tsp | For that smoky touch |
| Garlic Powder 🧄 | 1 tsp | Fresh garlic if you're feeling fancy |
| Onion Powder 🧅 | 1 tsp | Fresh onion if you're prepping ahead |
| Salt 🧂 | 1 tsp | Adjust to taste, kosher preferred |
| Black Pepper 🌶️ | ½ tsp | Freshly ground for best flavor |
The broth trio is key here. Store-brand cans work just as well as name brands—look for the low-sodium versions to keep flavors balanced. I always grab mine from Walmart or Trader Joe's since they're usually on sale. For the beans, stick with black, kidney, and chickpeas—they give you that perfect mix of texture and protein. If you've got canned tomatoes with herbs, toss those in for extra depth. The tomato paste? Buy the small can—it's perfect for this recipe and won't go to waste.
No smoked paprika? Regular paprika plus a pinch of cayenne gets you close. Short on cumin? Dried oregano at half the amount works in a pinch. The broths can be swapped—just keep the same ratio. Vegetarian? Skip the beef broth and double the vegetable. For a smokier flavor, char a whole onion and toss it in with the broth. The beans don't need rinsing if you're using no-salt-added, but if you're using regular, give them a quick rinse to cut back on sodium. And if you're really in a hurry, pre-chopped onions and garlic from the freezer section save time.
This soup gets better with time—3-4 days in the fridge is ideal. Freezes beautifully too, so make a double batch. I always portion mine into 4-cup servings for easy reheating. Store the broth cans in the pantry—they keep for up to 2 years unopened. The spices? Keep them in a dark, cool cabinet for maximum flavor. And if you're meal prepping, this soup reheats perfectly—just add a splash of water or broth if it's too thick.
Why You'll Love This Recipe
- Pantry Magic: I swear, this soup comes together with whatever’s already staring at me in the cupboard. Nine cans? That’s just a fun number—it’s really about dumping those beans, tomatoes, and chickpeas into one pot and letting them mingle. No fancy prep, no stress.
- Deep, Rich Bite: The mix of black beans, kidney beans, and chickpeas gives it this texture—creamy in spots, hearty in others—while the diced tomatoes and sauce add a tangy backbone. It’s the kind of flavor that lingers, the way a good stew should.
- Meal Prep MVP: Between us, this is my lazy Sunday project. Cook a big batch, and you’ve got lunches for the week—toss it in tortillas for tacos, serve it over rice, or just eat it straight from the pot. My kids even ask for it when they think I’m not looking.
- Budget-Friendly Powerhouse: A single can of beans costs pennies, and you’re feeding a crowd. Honestly, I’ve made this for game nights, potlucks, and even a last-minute dinner when I forgot to grocery shop. It’s the soup that doesn’t judge your wallet.
Step-by-step instructions for 9-Can soup
This hearty, one-pot wonder comes together faster than you'd think.
Sauté the Spice Foundation
Heat a large Dutch oven or heavy pot over medium heat. Add the 1 tablespoon ground cumin, 1 teaspoon smoked paprika, 1 teaspoon garlic powder, and 1 teaspoon onion powder. Stir constantly for 30 seconds until the spices release their aroma and you can smell that warm, earthy cumin scent filling your kitchen.
Here's the thing—don't rush this step. The spices need time to toast slightly and bloom their flavors. After about 30 seconds, you'll notice the mixture darkening just slightly and filling your kitchen with that irresistible spice aroma. This is your signal to move forward—it's the flavor base for everything that follows.
Build the Flavor Base
Add the 1 can tomato paste to the pot and stir vigorously for 1 minute until it's fully incorporated and begins to darken. This creates a rich, concentrated base that will carry all the other flavors. Next, pour in the 1 can diced tomatoes (with juices), 1 can tomato sauce, and 1 can chicken broth.
Stir everything together and bring to a gentle simmer over medium-low heat. Let it cook uncovered for 5 minutes until the mixture thickens slightly and the raw tomato taste mellows. You'll see the sauce darken and develop a glossy sheen—this is where the magic starts happening. The acidity from the tomatoes will begin to soften, creating the perfect foundation for the beans and broths we'll add next.
Combine All the Beans and Broths
Add the drained 1 can black beans, 1 can kidney beans, and 1 can chickpeas to the pot. Stir gently to distribute them evenly. Then pour in the 1 can vegetable broth and 1 can beef broth. The broths will help balance the richness of the beans and create that perfect soup consistency.
Bring the mixture back to a gentle simmer over medium heat. Let it cook uncovered for 15 minutes, stirring occasionally. You'll notice the beans begin to soften slightly and the flavors meld together. The soup should be thick but still spoonable—if it's too thick, add a splash of water or broth to reach your desired consistency. This is where the soup transforms from a collection of ingredients to a cohesive, flavorful dish.
Season and Simmer to Perfection
Add the 1 teaspoon salt and 0.5 teaspoon black pepper to the pot. Stir well and taste the soup. This is your chance to adjust the seasoning—add more salt if needed, or a pinch of smoked paprika for extra depth. The soup should be rich, slightly smoky, and well-balanced.
Let the soup simmer uncovered for another 10 minutes to allow all the flavors to meld together. You'll know it's ready when the aroma is irresistible and the flavors are harmonious. The beans should be tender but still hold their shape, and the broth should coat the back of a spoon without being too thin. If you prefer a thicker soup, let it simmer longer to reduce slightly.
Serve Warm with Fresh Toppings
Ladle the soup into bowls and serve immediately. I like to top mine with fresh cilantro, a dollop of sour cream, or a sprinkle of crumbled feta cheese for extra flavor. The contrast of cool toppings against the warm, hearty soup is what makes it truly special.
This soup is even better the next day as the flavors deepen and intensify. It's the kind of dish that tastes like comfort—rich, satisfying, and packed with pantry staples. Serve it with crusty bread or over rice for a complete meal that's sure to impress.
Pro Tips For Making 9 Can Soup
- SOAK BEANS FIRST: I learned this the hard way—skipping soak time turns your 9-can soup into a gummy mess. Drain and rinse the black beans and chickpeas for 10 minutes before adding them. Kidney beans are fine unsoaked, but the others will thank you for the head start.
- DRAIN TOMATO SAUCE WELL: That extra liquid in canned tomato sauce is the reason your soup ends up watery. Drain it through a fine-mesh strainer into the pot instead of pouring it straight in—you’ll save yourself from thinning everything down later.
- SIMMER LOW AND LONG: High heat makes beans tough and sauce break apart. After combining everything, bring it to a bare simmer (small bubbles, not a rolling boil) and let it cook uncovered for 30-45 minutes. The flavors meld better, and you won’t end up with a mushy texture.
- ADD ACID LAST: Tossing in lime juice or vinegar too early curdles the chickpeas and makes the beans taste metallic. Wait until the very end—just before serving—to brighten the flavors without ruining the texture. A splash of lemon or a teaspoon of apple cider vinegar does the trick.
Common mistakes when making great 9 can soup
Skipping the Spice Toast
The most common mistake is rushing the spice toast in Step 1. Those 30 seconds of stirring let the spices bloom and develop their full flavor. I’ve seen people skip this step entirely, and the soup ends up tasting flat and underseasoned. Take your time here—it’s the foundation of all the flavor to come. 🌶️
Not Adjusting Liquid Levels
Some cooks add all the broths at once without checking consistency. If your soup is too thick after simmering, don’t panic—just add ½ cup water or broth and let it cook another 5 minutes. Conversely, if it’s too thin, simmer uncovered for 10-15 minutes to reduce. I’ve had people complain about soup that’s either gluey or watery—both are avoidable with patience.
Overlooking Salt Adjustments
Using regular (not low-sodium) cans means your soup could end up saltier than intended. Always taste and adjust with kosher salt after simmering. I’ve seen people skip this step and end up with bland soup. Pro tip: If using regular cans, reduce the added salt to ½ teaspoon and adjust to taste at the end.
Ignoring the Simmer Time
Rushing the simmering process is a big mistake. The beans need 25-30 minutes total of gentle simmering to soften properly and absorb flavors. I’ve had people pull the pot off the heat too early, resulting in crunchy beans and underdeveloped broth. Let it simmer uncovered—this helps thicken the soup naturally and deepen the flavors.
Using Expired Cans
Check your canned ingredients for expiration dates before starting. I’ve seen people use cans that were past their prime, leading to off flavors or even food safety issues. Store-brand cans are fine, but always check the dates. For the best results, use cans with at least 6 months of shelf life remaining. The beans and broths should smell fresh and free of any metallic or sour odors.
Not Tasting Before Serving
Many cooks assume the recipe’s seasoning is perfect without tasting. Always do a final taste test before serving. You might need more salt, a pinch of smoked paprika, or even a squeeze of lemon juice to brighten the flavors. I’ve had people serve soup that was good but could have been amazing with just a little more attention to seasoning. Trust your taste buds—they’re your best tool! ✨
Nutrition facts
Frequently asked questions
Can I make this soup vegetarian?
Simply swap the beef broth for an extra can of vegetable broth and use vegetarian-friendly toppings like avocado or vegan sour cream. The flavor remains rich and satisfying without any meat products.
How do I store leftovers?
Let the soup cool completely, then transfer to airtight containers. It keeps in the fridge for 3-4 days or freezes beautifully for up to 3 months. Reheat gently on the stove or microwave until steaming hot. Pro tip: Add a splash of broth when reheating to restore texture.
What if I don't have all 9 cans?
No problem! Use what you have—swap any can for a similar type (e.g., swap kidney beans for pinto beans). For broths, stick to the same ratio (1:1:1 chicken/vegetable/beef). The recipe is flexible, so adapt as needed. The key is balancing flavors, not exact quantities.
Can I make this soup in an Instant Pot?
Yes! Sauté the spices, then add all ingredients and cook on high pressure for 5 minutes. Quick-release the pressure, stir, and let it thicken for 5 minutes on sauté mode. The pressure cooker cuts time by half while keeping flavors deep. Just watch the liquid levels—Instant Pot soups may need less broth.
Why does my soup taste bland?
Most likely, you skipped the spice toast or didn't taste-test at the end. Always bloom spices for 30 seconds and adjust salt after simmering. For extra depth, add a pinch of smoked paprika or a splash of lemon juice before serving. Blandness usually means seasoning needs attention.