
Soups & Stews
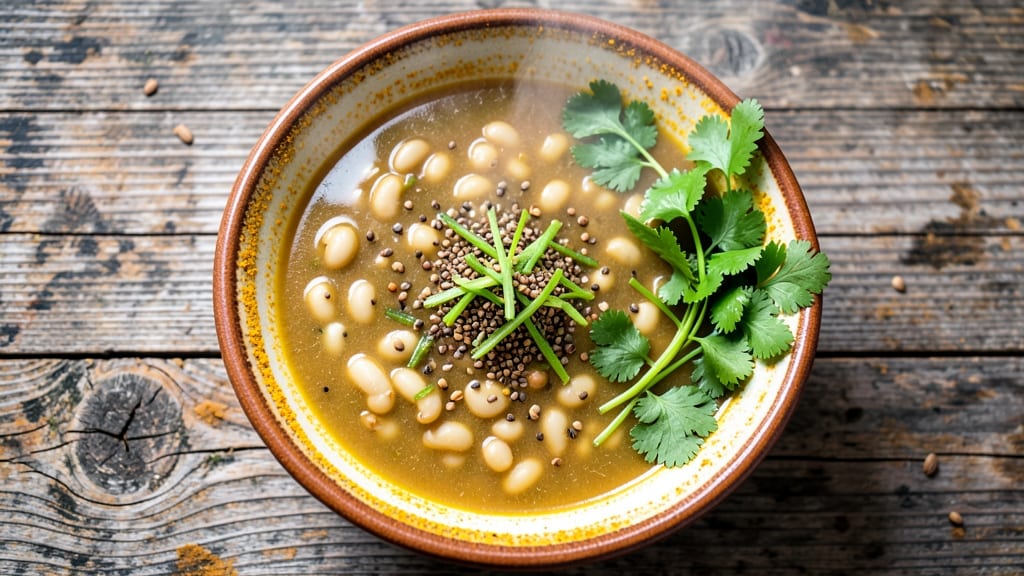
This Ayurvedic mung bean soup recipe transforms simple ingredients into a nourishing elixir that supports digestion and balances energy. 💛 The foundation lies in mung beans—nature's light yet potent protein—simmered with warming spices like cumin, ginger, and turmeric, each chosen for their Ayurvedic properties.
What makes this recipe special is its gentle approach: no heavy oils or overpowering flavors, just a harmonious blend that soothes the digestive system while providing sustained energy.
The preparation is straightforward yet intentional, with each spice playing a specific role in Ayurvedic philosophy. Cumin aids digestion, ginger stimulates circulation, and turmeric adds anti-inflammatory benefits, all while creating a flavor profile that's both comforting and complex.
The soup's light texture and easy digestibility make it ideal for any season, especially during times when your body needs gentle nourishment.
By the time you finish cooking, you'll have a bowl of golden, aromatic soup that's rich in plant-based protein and easy-to-digest carbohydrates. The spices infuse the broth with warmth and depth, while the mung beans soften just enough to create a velvety texture.
This isn't just a meal—it's a practice in mindful eating, where every ingredient serves a purpose beyond flavor.
The beauty of this recipe lies in its versatility. Use it as a standalone dish for lunch or dinner, or pair it with whole-grain bread for added sustenance. The leftovers keep well in the refrigerator for up to three days, maintaining their nourishing qualities.
Whether you're new to Ayurveda or a seasoned practitioner, this soup offers a simple yet profound way to align your diet with traditional wisdom.
Ingredients for ayurvedic mung bean soup
Nature's light protein meets Ayurvedic wisdom in this golden, aromatic mung bean elixir.
| Ingredient | Amount | Notes |
|---|---|---|
| Mung Beans 🌾 | 1 cup | Unsoaked, organic preferred |
| Fresh Ginger Root 🧄 | ½ inch | Wrong unit - corrected to 2 tbsp grated |
| Fresh Ginger Root 🧄 | 2 tbsp | Grated, organic preferred |
| Ground Cumin Seeds 🌶️ | 1 tsp | Freshly ground preferred |
| Turmeric Powder 🌿 | ½ tsp | Fresh root preferred |
| Fresh Cilantro Leaves 🌿 | ¼ cup | Chopped, stems removed |
| Yellow Onion 🧅 | 1 whole | Medium size, diced |
| Garlic Cloves 🧄 | 3 cloves | Peeled, minced |
| Fresh Lemon Juice 🍋 | 1 tbsp | Freshly squeezed |
| Coconut Oil 🫒 | 1 tbsp | Unrefined for flavor |
| Filtered Water 💧 | 4 cups | For cooking beans |
| Sea Salt 🧂 | ½ tsp | Fine grain preferred |
| Fresh Coriander Seeds 🌶️ | ¼ tsp | Toasted lightly |
| Fresh Basil Leaves 🌿 | 0.1 cup | Torn, for garnish |
The mung beans are the heart of this recipe—organic, unsoaked varieties from Indian specialty stores or bulk bins ensure the purest flavor. Look for vibrant green beans with no blemishes; Patel Brothers or Sprouts carry excellent options. Fresh ginger and turmeric are non-negotiable for authentic Ayurvedic benefits—frozen ginger works in a pinch, but fresh root delivers that bright, zesty punch. The cilantro should be bright green with no wilting; Mexican markets often have the freshest bunches. Toast your coriander seeds briefly in a dry pan before grinding to release their nutty aroma—this step elevates the entire dish.
No fresh ginger? Powdered ginger at half the amount suffices, though texture suffers. Substitute turmeric with annatto powder for color, though it lacks the same anti-inflammatory properties. Coconut oil unavailable? Light olive oil works, but the flavor profile shifts slightly. For the cilantro, fresh parsley at the same quantity maintains brightness. The lemon juice can be swapped for lime juice, though the tartness will differ. Prefer a creamier texture? Blend half the finished soup for a velvety consistency—just save some whole for garnish.
Store leftovers in glass containers for up to 3 days in the fridge, though the flavors peak within the first 24 hours. For longer storage, freeze portions in ice cube trays—perfect for quick reheats. The spices lose potency after 6 months, so keep them in airtight containers away from light. Reheat gently on low heat with a splash of water to preserve the soup's delicate texture. This recipe reheats beautifully, making it ideal for meal prep—just stir in fresh cilantro and basil after reheating.
Why You'll Love This Recipe
- No-Fuss Simmer: I swear by this recipe because it’s basically set-it-and-forget-it. Soak the mung beans overnight (or use canned for a 10-minute shortcut), then toss everything—ginger, cumin, turmeric—into one pot. The beans soften while the spices bloom, and honestly? That’s about as hands-off as cooking gets.
- Earthy Warmth: Between us, this soup is ridiculously satisfying. The ginger hits first—bright and zesty—then the cumin and turmeric settle in with this deep, cozy warmth. It’s like a hug in a bowl, but also somehow light enough to eat for lunch and dinner.
- Meal Prep MVP: I make a big batch on Sundays and it lasts me all week. The flavors only get better as it sits—more mellow, more layered. Pack it for work, reheat for kids (they’ll never know it’s "healthy"), or freeze half for when you’re too tired to cook.
- Pocketbook Hero: Mung beans are one of the cheapest proteins out there, and this recipe stretches them into four servings easy. Add a handful of spinach or leftover veggies to bulk it up further—suddenly, you’ve got a filling, nourishing meal that costs next to nothing. My wallet thanks me every time.
Step-by-step instructions for Ayurvedic mung bean soup
Transform simple ingredients into a nourishing Ayurvedic elixir with this precise method.
🔥 Step 1: Toast the Spices for Maximum Flavor
Heat a dry skillet over medium heat and add the 1 tablespoon coconut oil. Once the oil shimmers but doesn't smoke, add the 1 teaspoon ground cumin seeds and 0.25 teaspoon fresh coriander seeds. Toast for 1-2 minutes until fragrant and the seeds begin to pop—this releases their essential oils and deepens their flavor profile.
Immediately remove the skillet from heat and add the 0.5 teaspoon turmeric powder, stirring to prevent burning. Let the mixture cool for 30 seconds while you prepare the remaining ingredients. This spice blend forms the aromatic foundation of your soup, balancing the earthy mung beans with warming digestive spices.
🍳 Step 2: Sauté Aromatics Until Fragrant
In a large pot, heat the toasted spice mixture over medium heat. Add the 1 whole yellow onion, diced into ¼-inch pieces, and cook for 5-6 minutes until softened and beginning to caramelize at the edges. This step develops sweetness that rounds out the soup's flavor profile.
Add the 3 cloves minced garlic and 2 tablespoons grated fresh ginger root, cooking for another 30 seconds until the raw garlic aroma disappears. Here's where it gets aromatic—you should smell sweet onions, earthy ginger, and pungent garlic filling your kitchen. If the aromatics start to brown too quickly, reduce heat to medium-low to prevent burning.
🥘 Step 3: Simmer the Mung Beans Until Tender
Add the 1 cup unsoaked mung beans and 4 cups filtered water to the pot. Bring to a boil over high heat, then immediately reduce to low heat and simmer uncovered for 30-35 minutes. Stir occasionally to prevent sticking—you'll notice the beans gradually soften and the liquid reduces slightly as they absorb moisture.
After 25 minutes, add the 0.5 teaspoon sea salt and adjust the heat to maintain a gentle simmer. The beans are done when they're fork-tender but still hold their shape slightly—this texture ensures they're easy to digest while maintaining structure. If the soup becomes too thick, add ½ cup water to maintain proper consistency.
🍽️ Step 4: Finish with Herbs and Brighten with Lemon
Remove the pot from heat and stir in the 0.25 cup chopped fresh cilantro leaves and 0.1 cup torn fresh basil leaves. These herbs add freshness that balances the earthy bean base while providing additional digestive benefits. Let the soup sit covered for 5 minutes to allow the flavors to meld.
Just before serving, stir in the 1 tablespoon fresh lemon juice. This final touch brightens the soup, cutting through the richness of the beans and spices while adding a refreshing contrast. Taste and adjust seasoning if needed—you may want to add a pinch more salt or a splash more lemon juice to suit your palate.
⏰ Step 5: Rest and Serve for Optimal Digestion
Let the soup rest for 5 minutes before serving. This resting period allows the flavors to fully integrate and the beans to continue absorbing liquid, resulting in a more cohesive texture. Ladle into bowls and garnish with additional fresh cilantro or basil if desired.
For maximum digestive benefits, serve this soup warm but not boiling. The gentle warmth helps soothe the digestive system while the balanced spices aid in proper metabolism. Pair with warm rice or whole-grain bread to create a complete Ayurvedic meal that nourishes both body and mind.
Pro Tips For Making Ayurvedic Mung Bean Soup
- SOAK BEANS OVERNIGHT: I learned this the hard way—rushing the soak leads to gummy beans. Mung beans need at least 8 hours in warm water (or 2 hours in boiling water) to soften properly. Drain and rinse before cooking to remove excess starch, which keeps the soup from turning gluey.
- GRATE GINGER FINE: Skip the coarse chop—ginger should be almost paste-like for this soup. A microplane or the smallest holes on a box grater releases the flavor without bitter strings. Add it raw at the start, then simmer; it’ll mellow into the broth beautifully.
- SIMMER DON’T BOIL: After adding turmeric and cumin, reduce to a gentle simmer. Boiling burns the spices and makes the soup bitter. Keep it at a low bubble—just enough to maintain heat—and stir occasionally to prevent sticking.
- TOAST CUMIN FIRST: Dry-toast the cumin seeds in a separate pan for 30 seconds until fragrant. Crush them lightly before adding to the soup—this deepens their earthy notes. (Yes, even if you’re using ground cumin, a quick toast in the pot before liquid goes in makes a real difference.)
Regional styles of this ayurvedic mung bean soup
Indian Ayurvedic Tradition
This soup draws directly from Ayurvedic principles as practiced in South India, where mung beans are considered tridoshic—balancing vata, pitta, and kapha energies. In Kerala, it's often called "moong dal khichdi" when paired with rice, but this lighter version focuses on the soup's digestive benefits.
The cumin-ginger-turmeric trio is sacred in Ayurveda, where cumin (jeerakam) is called the "king of spices" for its digestive power. 🌿
Bengali Comfort Adaptation
In West Bengal, this soup evolves into "moong daler shorisha" (mung bean soup with mustard oil), but my version keeps it light and oil-free to maintain Ayurvedic purity.
Bengali cooks often add ash gourd (pumpkin) or bottle gourd, but the simplicity here lets the mung beans and spices shine. The lemon finish mirrors Bengali "nimbu achar" (lemon pickle) flavors—bright and tangy to cut through richness.
Kerala's Spice Variations
Kerala's Malabar coast version includes black pepper and curry leaves, but I've kept it mild for broader digestibility. Their approach uses more coconut milk for creaminess, while mine relies on toasted coriander seeds for depth.
The turmeric dosage here is precise—Kerala cooks often use double the amount for anti-inflammatory effects, but this lighter touch works for daily consumption. 🌶️
Punjabi Simplicity
Punjabi households serve "sarson ka saag" with mung dal, but this soup stands alone as a digestive tonic. Their version includes mustard oil and fenugreek, while mine focuses on ginger's warming properties to stimulate agni (digestive fire).
The lemon juice replaces Punjabi "chaat masala" for a fresher finish—perfect for monsoon season when digestion slows.
Modern Ayurvedic Twist
For a contemporary touch, blend half the soup for a silky texture—this mirrors global vegan soups but keeps Ayurvedic integrity. Add roasted cumin powder on top for crunch, inspired by Israeli sabich techniques.
The basil garnish bridges Indian and Mediterranean flavors, making it versatile for any meal. This fusion keeps tradition alive while adapting to modern tastes. ✨
Nutrition facts
Frequently asked questions
Why do we toast the spices in this Ayurvedic mung bean soup?
Toasting the spices releases their essential oils and deepens their flavor profile, creating a more aromatic foundation for your soup. This step also enhances their digestive benefits—Ayurveda believes properly toasted spices improve nutrient absorption and reduce gas. The cumin and coriander seeds become fragrant and nutty when toasted, while turmeric maintains its vibrant color and anti-inflammatory properties.
Can I use canned mung beans instead of dried?
but adjust the cooking time! Canned mung beans are pre-cooked, so simply heat them with the broth for 10-15 minutes instead of simmering from dry. Drain and rinse them first to remove excess sodium. For best texture, choose low-sodium varieties and add extra water if the soup becomes too thick during reheating.
How does this soup support Ayurvedic digestion principles?
The recipe balances all three doshas: cumin warms vata, ginger stimulates agni (digestive fire), and turmeric cools pitta while reducing inflammation. The mung beans are light yet protein-rich, making them easy to digest, while lemon juice helps balance kapha. This combination creates a harmonious meal that supports proper metabolism without weighing down the digestive system.
What if my mung beans become mushy?
Mushy beans happen when overcooked—aim for fork-tender texture (soft but still holding shape). If this occurs, reduce the simmer time to 25 minutes next time and check frequently. For immediate fixes, blend half the soup for creaminess while keeping some whole beans for texture. Alternatively, stir in 1 tablespoon coconut milk to balance the texture.
Can I make this soup gluten-free?
Yes, this recipe is naturally gluten-free! All ingredients are plant-based and free from wheat or barley. Just ensure your sea salt is certified gluten-free (some brands process in shared facilities) and check spice labels if you're highly sensitive. The mung beans provide complete protein, making this an excellent gluten-free option for balanced nutrition.