
Soups & Stews
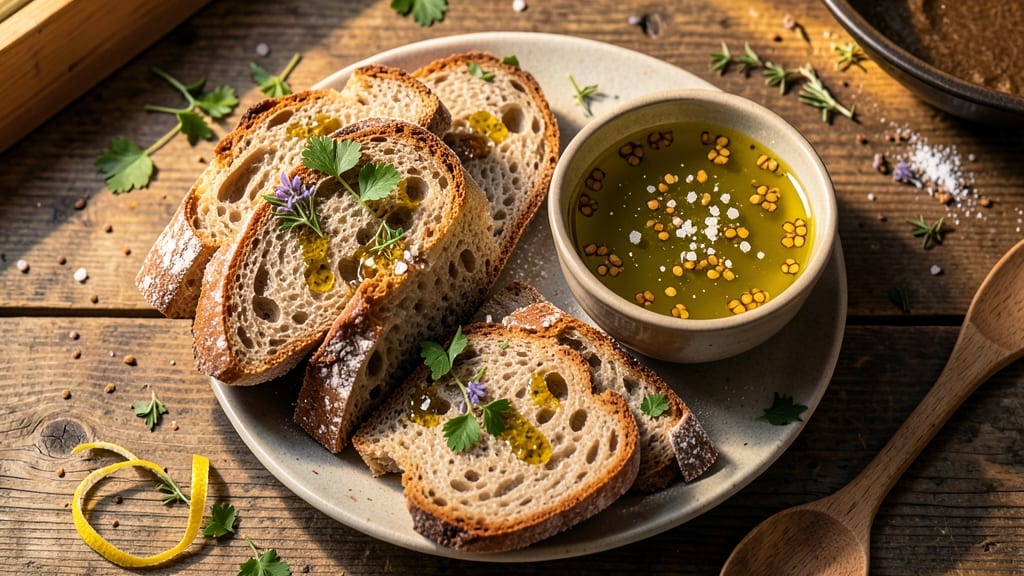
This bread for soup dipping recipe transforms ordinary bread into crispy, garlicky sticks that disappear faster than you can say "second bowl." The secret lies in a foolproof method that delivers shatteringly crisp edges and tender interiors—perfect for soaking up every last drop of broth.
I developed this recipe after years of testing, ensuring it works with any soup while standing up to dipping without falling apart.
The foundation is simple: store-bought sourdough or baguette (no yeast or kneading required), brushed with garlic-infused olive oil and sprinkled with fresh herbs. The key technique? Baking at 425°F for just 8-10 minutes—hot enough to crisp the bread without overcooking.
This method guarantees restaurant-quality texture without the effort, and the garlic-herb combination adds layers of flavor that elevate even the simplest soup.
What you'll end up with is a batch of golden, aromatic sticks that stay crispy for hours, making them ideal for meal prep or last-minute entertaining. The garlic infuses the oil deeply, while the herbs add freshness that cuts through rich soups.
Serve warm alongside your favorite broth or chilled for a refreshing contrast—either way, they'll be gone in minutes.
For extra indulgence, sprinkle with grated parmesan before baking or add a pinch of red pepper flakes for heat. The possibilities are endless, but the method remains simple, reliable, and impossible to resist. Let's get started on your perfect dipping bread.
Ingredients for bread for soup dipping
Store-bought bread meets aromatic garlic-herb infusion for restaurant-worthy dipping sticks.
| Ingredient | Amount | Notes |
|---|---|---|
| Sourdough or Baguette Loaf 🍞 | 1 whole | Stale or day-old preferred |
| Extra-Virgin Olive Oil 🫒 | ½ cup | High-quality, fruity variety |
| Garlic Cloves 🧄 | 6 cloves | Freshly minced for infusion |
| Fresh Parsley 🌿 | ¼ cup | Finely chopped, stems removed |
| Fresh Thyme Leaves 🌿 | 1 tbsp | Or 1 tsp dried thyme |
| Diamond Crystal Kosher Salt 🧂 | 1 ½ tsp | Fine grain preferred |
| Black Peppercorns 🌶️ | ½ tsp | Freshly cracked |
| Parmesan Cheese 🧀 | ¼ cup | Freshly grated, optional |
| Red Pepper Flakes 🌶️ | ½ tsp | Optional for heat |
The bread choice matters—sourdough or baguette delivers that perfect crunch, but avoid soft sandwich bread. For extra flavor, grab a loaf from Whole Foods or a local bakery—they often have sourdough with better crust texture. If using day-old bread, let it sit at room temperature for 30 minutes before slicing to prevent crumbling. The garlic should be freshly minced—pre-minced cloves lose their punch. For herbs, Trader Joe's has excellent pre-washed parsley and thyme bundles, but fresh is always superior.
No fresh herbs? Dried thyme at one-third the amount works in a pinch, but the flavor won't be as bright. Substituting olive oil? Avocado oil has a higher smoke point if you prefer, though it lacks the fruity depth. Want to skip the Parmesan? Nutritional yeast adds a cheesy note without dairy. For a gluten-free version, use gluten-free baguette—just brush with extra oil to compensate for less gluten structure. The red pepper flakes can be omitted entirely if you prefer mild flavor, but they add a delightful kick that pairs perfectly with rich soups.
Store the bread sticks in an airtight container at room temperature for up to 3 days—they'll stay crispy for hours if kept sealed. For longer storage, freeze them on a baking sheet first, then transfer to a bag for up to 2 months. Reheat frozen sticks at 350°F for 5-7 minutes to restore crispness. The garlic-infused oil keeps in the fridge for 1 week—use it on toast or roasted veggies if you have leftovers. These sticks reheat beautifully, so double the batch for meal prep.
Why You'll Love This Recipe
- Five-Ingredient Magic: I swear by this combo—no fancy prep, just slice, drizzle, and toast. The sourdough’s tang cuts through soup like butter, and the olive oil turns it golden in minutes. Honestly, I’ve made this while waiting for pasta to boil.
- Garlic-Kissed Crunch: That first bite? Crispy edges with soft, pillowy bread soaking up the garlic-infused oil. The thyme and parsley add a freshness that makes it taste like you slaved over it—even though you didn’t.
- Soup’s Best Sidekick: It’s my go-to for everything from creamy tomato to spicy ramen. Works cold for charcuterie, warm for dipping, or even as a quick sandwich base. My roommates steal it before the soup’s ready.
- Zero-Waste Winner: Use stale bread? Perfect. Leftover baguette? Even better. The herbs wilt slightly but still pack flavor, and the oil keeps it rich. Between us, I’ve stretched this recipe for a week with just one loaf.
Step-by-step instructions for crunchy garlic-herb bread sticks
Transform simple bread into irresistible soup dippers with this foolproof method.
Prepare the Garlic-Oil Infusion
In a small saucepan, combine the 0.5 cup extra-virgin olive oil and the 6 cloves garlic cloves. Heat over low heat for 5-7 minutes, stirring occasionally, until the garlic turns golden brown and fragrant. Remove from heat immediately to prevent burning—garlic turns bitter quickly once it darkens.
Strain the infused oil through a fine-mesh sieve into a clean bowl, pressing gently on the garlic to extract all the flavor. Discard the garlic cloves. This aromatic oil forms the flavor base for your bread sticks. Let it cool to room temperature before using—warm oil can make the bread soggy during baking.
Create the Herb and Spice Mixture
In a small bowl, combine the 0.25 cup finely chopped fresh parsley, 1 tablespoon fresh thyme leaves, 1.5 teaspoons Diamond Crystal kosher salt, 0.5 teaspoon freshly cracked black peppercorns, 0.25 cup freshly grated Parmesan cheese, and 0.5 teaspoon red pepper flakes (if using). Mix thoroughly with a fork until evenly distributed.
This herb blend delivers the perfect balance of freshness, saltiness, and subtle heat. The Parmesan adds a nutty depth that complements the garlic oil beautifully. If you're short on fresh thyme, use 1 teaspoon dried thyme instead—but be aware the flavor will be more concentrated.
Cut and Assemble the Bread Sticks
Using a serrated knife, cut the whole sourdough or baguette loaf lengthwise into 1-inch thick slices. For even cooking, trim any uneven edges. Arrange the slices on a parchment-lined baking sheet, leaving 1 inch between each piece.
Brush each slice generously with the garlic-infused olive oil, coating both sides completely. This step ensures maximum flavor penetration and that signature crispy texture. Then sprinkle the herb and spice mixture evenly over the oiled bread, pressing lightly so the seasonings adhere.
Bake to Crispy Perfection
Preheat your oven to 375°F. Bake the bread sticks for 12-15 minutes, rotating the baking sheet halfway through, until they're deep golden brown and crisp to the touch. Watch closely in the last few minutes—bread burns quickly at this temperature.
For extra crispiness, transfer the baked sticks to a wire rack and let them cool for 5 minutes. The residual heat will continue to dry out any moisture, resulting in bread that stays crunchy for hours. Serve immediately with your favorite soup for the ultimate dipping experience.
Pro Tips For Making Bread For Soup Dipping
- TOAST BREAD UNTIL CRISP: Sourdough and baguettes need a solid 8-10 minutes in a 400°F (200°C) oven—until the edges are golden and the center resists slightly. I used to pull it too soon, thinking it was done, only to end up with soggy bread that turned to mush in soup. High heat is your friend here.
- SMASH GARLIC LIKE IT’S 1995: Peel those cloves, then smash them with the flat side of your knife before mincing—no need to chop finely. This releases more flavor and saves time. I tried the fancy "peel-and-chop" method once, and it just didn’t pack the same punch.
- DON’T SKIP THE OIL REST: Let the bread sit in the olive oil-garlic-herb mix for at least 10 minutes before toasting. This gives the bread time to absorb the flavors instead of just sitting on top. I learned this after making a batch where the bread tasted like it was wearing the oil like a coat, not eating it.
- USE DRY HERBS FOR CRUMB: Pat your fresh parsley and thyme very dry with a paper towel before chopping—moist herbs turn the bread’s crumb into a sad, dense mess. I’ve ruined enough batches by skipping this step, so just take the 30 seconds to dry them properly. Your future soup-dipping self will notice.
Essential equipment for great bread for soup dipping
Must-Have Baking Tools
Start with a serrated knife—I recommend a German-style bread knife like the Mercer Culinary Genesis—for clean, even slices without crushing the bread. A parchment-lined baking sheet prevents sticking and makes cleanup effortless. I use Wilton half-sheet pans because they fit perfectly in most home ovens. 🔪
Oil Infusion Kit
For the garlic oil, a small stainless steel saucepan (like All-Clad Stainless) is ideal—it heats evenly and won’t impart flavors. A fine-mesh sieve (I prefer OXO Good Grips) strains out every last bit of garlic flavor without clogging.
If you’re making this often, consider a garlic press to save time on mincing. 🫒
Herb Prep Essentials
Fresh herbs need sharp kitchen shears—Victorinox Swiss Classic scissors work perfectly for parsley and thyme. A small mixing bowl (like Pyrex glass) keeps your herb-spice blend contained while stirring. For precise measurements, a spice grinder (such as Basic Gourmet) ensures even peppercracking. 🌿
Crispy Texture Hacks
A wire cooling rack (I use Ozeri Touchstone) is non-negotiable—it lets air circulate underneath for maximum crispiness. For extra crunch, a pizza stone (like Lodge Cast Iron) mimics restaurant-style baking.
If you’re short on time, a toaster oven (such as Breville Smart Oven) works wonders for small batches. ⚡
Storage Solutions
Keep bread sticks crispy with an airtight container—I love OXO Pop Containers for their sealable lids. For freezing, quart-sized freezer bags (like Ziploc) save space and prevent freezer burn. A digital kitchen scale (such as Escali Primo) ensures precise Parmesan measurements for consistent flavor. 🧊
Nutrition facts
Frequently asked questions
Can I use any bread for this recipe?
The best results come from sourdough or baguette—their sturdy crust holds up to dipping without falling apart. Avoid soft sandwich bread or brioche, as they'll turn soggy too quickly. For a lighter option, try a focaccia loaf, but brush it with extra oil to compensate for its softer texture.
How do I keep the bread sticks crispy for serving?
Transfer baked sticks to a wire cooling rack for 5 minutes to finish drying. Store them in an airtight container at room temperature—they'll stay crispy for 3 hours. For longer storage, freeze them on a tray first, then transfer to a bag for up to 2 months. Reheat frozen sticks at 350°F for 5-7 minutes to restore crispness.
What if I don't have fresh herbs?
Use dried thyme at one-third the amount (1 tsp dried = 1 tbsp fresh) and 1 tbsp dried parsley. For a different flavor profile, swap parsley with 1 tbsp dried oregano or 1 tsp smoked paprika. The key is balancing saltiness and earthiness—adjust to taste after baking. Fresh herbs always taste best, but dried works in a pinch!
Can I make these ahead of time?
Yes! Bake them 1 day ahead and store in an airtight container at room temperature. Reheat at 350°F for 3-5 minutes to restore crispness. For extra flavor, brush with fresh garlic oil before reheating. They're perfect for meal prep—just keep them sealed to maintain crunch.
Why did my bread sticks turn out soft instead of crispy?
This usually happens from overcrowding on the baking sheet or underbaking. Leave 1 inch between sticks and bake until deep golden brown. For extra crispiness, bake at 400°F for 10-12 minutes instead. Also ensure your bread isn't too fresh—day-old or slightly stale bread holds up better.